OvrvisionSDK  2.00
Getting Started

Ovrvision Features and Overview

topimage.jpg

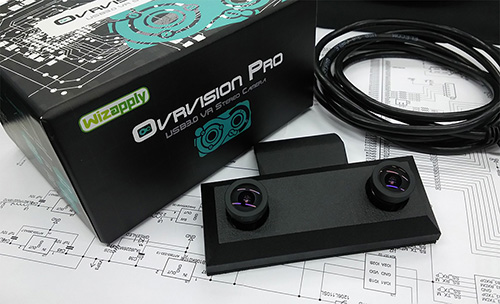
This is a high performance stereo camera where immersive AR and hand tracking are possible by fitting the Ovrvision Pro onto Oculus Rift. Ovrvision Pro realizes high FPS, high resolution, wide viewing angle, both-eye synchronization, and low delay. It is equipped with EEPROM and GPIO along with an embedding-type extension slot that can be utilized for robot sensors. It supports game engines such as Unity5 and Unreal Engine and AR software, and when combined with the Ovrvision Pro SDK that comes free of charge, a developmental environment of high versatility is possible. Ovrvision Pro SDK is provided by MIT LICENSE as a license for open-source software, and it can be used freely regardless of commercial use.

Ovrvision ProはOculus Riftに装着する事で没入型ARやハンドトラッキングが行える高性能ステレオカメラです。 高FPS、高解像度、広視野角、両眼同期、低遅延を実現しています。EEPROMやGPIOを搭載し組み込み系の拡張スロットを備えているため、ロボセンサーなどにも活用可能です。 Unity5、Unreal EngineなどのゲームエンジンやARソフトウェアをサポートして無償提供されるOvrvision Pro SDKと合わせて汎用性の高い開発環境が整っています。 Ovrvision Pro SDKはオープンソースソフトウェアのライセンスであるMIT LICENSEで提供され、商用利用問わず自由にご利用頂けます。

More : http://ovrvision.com/

About Camera Data

The camera option supported is shown below.
対応しているカメラオプションは下記に示します。

camparam_table.jpg

About OvrvisionSDK Processing

processing.jpg

The image upper 8bit is a left eye and lower 8bit is right eye, 16-bit data is transmitted.
Although that is using the UVC standard, In the case of usual camera software, become such an image.

1ピクセルで、上位8ビットが左目、下位8ビットが右目の16bitデータとして送信されています。
UVC規格を使用しておりますが、通常のカメラソフトの場合は、このような画像となります。

noprocimage.jpg

Demosaic and undistortion are processed using GPU by OvrvisionSDK, the normal image is outputted.
OvrvisionSDK側で、デモザイク処理、歪み補正処理をGPUにて行い正常な画像データを作り出しています。

procimage.jpg

ovrvision_app_csharp.exe

Content Structure

Ovrvision SDK

  • bin/
    • x86/ : Program files for x86 CPU (Windows Only)
      • ovrvision_app_csharp.exe : Ovrvision Pro Camera C# Viewer
      • ovrvision_app.exe : Ovrvision Pro Camera C++ Viewer
      • ovrvision_oculus_app.exe : When looking by Oculus Rift
    • x64/ : Program files for x86_64 CPU (Windows Only)
      • ovrvision_app.exe : Ovrvision Pro Camera C++ Viewer
      • ovrvision_oculus_app.exe : When looking by Oculus Rift
    • ovrvision_app.app/ : OvrvisionPro Camera Viewer for Mac OSX (Mac OSX Only)
    • demo/ : Demonstration
      • ovrvision_figure.exe : The AR demonstration using a product package.
  • include/ : include files
  • tools/
    • ovrvision_calibration.exe : Calibration Tool
    • ovrvision_clear_eeprom.exe : Calibration Reset Tool (Windows Only)
    • chess4x7x30mm.pdf : The calibration board for printing.
  • marker_samples/
  • examples/
    • 3rdparty/ : Other libraries which use with examples
    • vs2013/ : VisualStudio 2013 build project files
    • vs2015/ : VisualStudio 2015 build project files
  • LICENSE : Ovrvision SDK license
  • OculusVR_LICENSE : Oculus Rift license for lib

Recommended System Requirements

  • CPU : Intel Core i5,i7 (Haswell) 3.0Ghz processor, AMD FX-6300 processor or faster
  • GPU GeForce GTX 760, AMD Radeon R9 280 or faster (OpenCL1.2 or more)
  • Memory : DDR3-1600 8GB or more
  • Interface : USB3.0 Port
  • OS
    • Windows 7, 8.1 and 10
    • Mac OS X 10.10
    • Linux (in the future)
  • Development Environment : VS2013, VS2015, Xcode7, Unity5.3.0, UnrealEngine4.10(in the future)

Installation

Step 1: Setup your environment

Before you start developing applications with the Ovrvision Pro, setup the environment of a your computer.

  1. Install latest USB3.0 driver.
  2. Install latest GPU driver. (OpenCL1.2 or more)
  3. Install latest Oculus Rift v0.8 runtime.(Only when Oculus Rift is used.)
  4. Install development environment, VisualStudio and Unity5 and etc...

OvrvisionProを接続する前に、パソコンの環境を設定する。

  1. 最新のUSB3.0 driverをインストール
  2. 最新のGPUドライバをインストール(OpenCL1.2以上に対応するもの)
  3. 最新のOculus Runtime v0.8をインストール(Oculus Riftを使用する場合のみ)
  4. VisualStudioやUnityなどの開発環境を予めインストール

Step 2: Run the Ovrvision Pro

Run Ovrvision Pro.

  1. Connect the OvrvisionPro to USB3.0 port.
  2. Standard UVC driver is installed.
  3. Start "ovrvision_app_csharp.exe" in bin folder, and the camera open.
  4. It will complete, if the Ovrvision Pro works satisfactorily.

Ovrvision Proを動かしてみる

  1. OvrvisionProをUSB3.0ポートに接続する
  2. 標準のUVCドライバがインストール
  3. binフォルダ内の「ovrvision_app_csharp.exe」を起動しオープン
  4. カメラ画像が問題なく動作すれば完了

Step 3: Ovrvision Pro calibration.

You should do a calibration, because it connects with environment.

  1. How to use a calibration tool is here. :Calibration tool
  2. Run the [bin -> x86 or x64 -> ovrvision_app.exe]

環境に合わせるため、キャリブレーションを行う
キャリブレーションはカメラレンズの変更がない限り、初回のみで良い

  1. キャリブレーションツールの使い方はこちら:Calibration tool
  2. bin -> x86 or x64 -> ovrvision_app.exeを起動

SDK License

Copyright(C) 2013-2019 Wizapply

MIT License
THE SOFTWARE IS PROVIDED "AS IS", WITHOUT WARRANTY OF ANY KIND, EXPRESS OR
IMPLIED, INCLUDING BUT NOT LIMITED TO THE WARRANTIES OF MERCHANTABILITY,
FITNESS FOR A PARTICULAR PURPOSE AND NONINFRINGEMENT. IN NO EVENT SHALL THE
AUTHORS OR COPYRIGHT HOLDERS BE LIABLE FOR ANY CLAIM, DAMAGES OR OTHER
LIABILITY, WHETHER IN AN ACTION OF CONTRACT, TORT OR OTHERWISE, ARISING FROM,
OUT OF OR IN CONNECTION WITH THE SOFTWARE OR THE USE OR OTHER DEALINGS IN
THE SOFTWARE.